
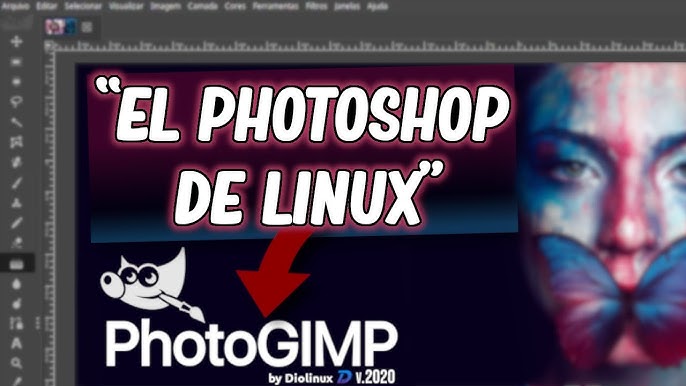
PhotoGIMP is a popular customization patch designed to transform the user interface of GIMP into a layout that closely resembles Adobe Photoshop. It streamlines the editing experience for users who are transitioning from Photoshop to the free and open-source GIMP platform. With its familiar workspace and enhanced shortcuts, PhotoGIMP makes GIMP more accessible for professionals and beginners alike.
If you’re a Windows user wondering whether PhotoGIMP is compatible with your system, the answer is yes. PhotoGIMP can be easily installed and used on most modern Windows versions, making it a practical solution for enhancing your editing workflow without cost.
What is PhotoGIMP?
PhotoGIMP is a community-developed patch or modification created to enhance the usability of GIMP (GNU Image Manipulation Program), an open-source image editor. While GIMP is a powerful and highly customizable tool, it often feels unfamiliar and unintuitive to users coming from Adobe Photoshop. PhotoGIMP addresses this gap by transforming GIMP’s interface, layout, and keyboard shortcuts to closely resemble the Photoshop environment.
A Patch, Not a Separate Program
PhotoGIMP is not a standalone application. Instead, it is a set of pre-configured files that modify the appearance and functionality of GIMP. These files typically include custom themes, layout configurations, renamed tools, icon sets, and redefined shortcut keys. When applied correctly, PhotoGIMP replaces GIMP’s default UI elements with ones that mimic the Adobe Photoshop interface. The goal is to offer a smoother transition for users who are accustomed to Photoshop’s workflow but want to switch to a free, open-source alternative.
Main Purpose: Familiarity for Photoshop Users
The primary goal of PhotoGIMP is to make GIMP feel like Adobe Photoshop. This includes changes to the position of panels, toolbox arrangements, naming conventions, and shortcut mappings. For example, common Photoshop shortcuts like Ctrl+T for transform or Ctrl+D to deselect are integrated into PhotoGIMP. The workspace is also redesigned to resemble Photoshop’s default look, with the layers panel, brush settings, and tool options placed in familiar locations.
This significantly reduces the learning curve for Photoshop users who might otherwise struggle with GIMP’s native layout and keyboard mapping. Rather than relearning a completely new interface, users can dive directly into their work with minimal adjustment.
Common Uses of PhotoGIMP
PhotoGIMP is widely used by digital artists, photo editors, graphic designers, and students looking for a free alternative to Photoshop without sacrificing workflow efficiency. Since GIMP already supports many professional-grade features such as layer masks, blending modes, path tools, and plug-in extensions, PhotoGIMP simply enhances the accessibility of those tools through a more intuitive layout.
- Photo Editing: For photographers and content creators, PhotoGIMP allows for high-quality image corrections, retouching, and enhancements using a familiar toolset. The Photoshop-style UI helps users locate filters, selection tools, and adjustment layers more quickly.
- Digital Art: Artists who draw, sketch, or paint digitally can benefit from GIMP’s built-in brush engine and customizable canvas settings. With PhotoGIMP, the experience becomes more aligned with what they might expect from Adobe Photoshop, including quick access to brush settings and layers.
- Graphic Design: Designers working on web graphics, social media assets, and print materials find that PhotoGIMP streamlines their process. The modified interface supports the fast-paced nature of design tasks where keyboard shortcuts and layout familiarity can make a significant difference in productivity.
Compatibility with Windows
PhotoGIMP is designed to enhance the GIMP experience by offering a user interface that closely mimics Adobe Photoshop. While it functions as a patch, its compatibility is directly tied to the operating system and the version of GIMP installed. This section explores how well PhotoGIMP works on various versions of Windows and what users need to ensure for a smooth installation and performance.
Supported Windows Versions
PhotoGIMP is compatible with modern Windows operating systems, particularly Windows 10 and Windows 11. These two versions are the most extensively tested and widely used platforms for running both GIMP and the PhotoGIMP patch. The installation process, UI integration, and performance optimization are seamless on these versions, provided that system specifications meet GIMP’s requirements.
Windows 11, being the latest release, supports improved display scaling, touch interactions, and overall system responsiveness, which can enhance the PhotoGIMP experience, especially on high-resolution monitors or multi-display setups. Windows 10 also remains a solid choice, offering stability and performance without major compatibility issues.
Users operating on legacy systems such as Windows 7 or Windows 8 may encounter limitations. Although GIMP might still run on these older platforms, PhotoGIMP’s installation process may not fully integrate as intended. Additionally, certain user interface features or fonts may not load correctly due to system limitations or outdated libraries. Security updates and compatibility support for these versions have also ended, which increases the risk of instability or system vulnerabilities. For these reasons, the use of Windows 7 is not recommended for PhotoGIMP.
GIMP Requirements
Since PhotoGIMP functions as a modification layer over GIMP, it is essential that GIMP is correctly installed and meets the minimum system requirements. Users must first install a compatible version of GIMP—ideally the latest stable release—to ensure that the PhotoGIMP patch can be applied effectively.
The minimum system requirements for GIMP on Windows typically include:
- Operating System: Windows 10 or higher (64-bit recommended)
- Processor: Intel Pentium 4 or better (multi-core recommended)
- RAM: 4 GB minimum (8 GB or more recommended for large projects)
- Storage: At least 200 MB of free space for installation, plus additional space for plugins and assets
- Graphics: A GPU with OpenGL 3.3 support is recommended for best performance
- Display: 1280×768 resolution minimum (higher recommended for workspace efficiency)
It is important to note that PhotoGIMP may include additional fonts, icons, and themes that consume extra memory. Therefore, systems with higher RAM and faster CPUs will perform more efficiently, particularly when working on high-resolution images or complex compositions.
Before applying the PhotoGIMP patch, users should verify that their version of GIMP is compatible with the patch version. Mismatched versions could result in broken layouts, missing icons, or configuration errors. As a best practice, users are advised to back up their GIMP configuration folder before proceeding with the PhotoGIMP installation.
How to Install PhotoGIMP on Windows – Step-by-Step Guide
Installing PhotoGIMP on a Windows system is a simple yet effective way to enhance your GIMP experience, especially if you are used to Adobe Photoshop’s interface. Below is a comprehensive, step-by-step explanation to help you successfully install PhotoGIMP on your Windows computer.
Download and Install GIMP
Before applying the PhotoGIMP patch, you must first have GIMP installed on your system. GIMP (GNU Image Manipulation Program) is the foundation on which PhotoGIMP operates.
Visit the official GIMP website and download the latest stable version that is compatible with Windows. Run the installer and follow the on-screen instructions to complete the installation. Once GIMP is installed, launch it once to allow the software to create all necessary configuration files and folders. This step ensures that the directory structure is properly set up for the PhotoGIMP patch.
Download the PhotoGIMP Patch Files
The next step is to obtain the PhotoGIMP patch. This patch typically comes as a compressed ZIP file containing a customized set of configurations, themes, fonts, brushes, and layout files. These files are specifically arranged to mirror Adobe Photoshop’s user interface and workflow.
After downloading the patch, extract the ZIP file to a temporary location using a tool like WinRAR or 7-Zip. Make sure all extracted folders and files are intact and ready for transfer.
Locate GIMP’s Configuration Folder on Windows
GIMP’s configuration files are usually stored in a hidden folder within your user directory. On most Windows systems, the path to the GIMP configuration folder looks like this:
php-template
CopyEdit
C:\Users\<YourUsername>\AppData\Roaming\GIMP\<version>
For example, if you installed GIMP version 2.10, the path would typically be:
makefile
CopyEdit
C:\Users\JohnDoe\AppData\Roaming\GIMP\2.10
You can access this folder by enabling the option to view hidden files in File Explorer or by pasting the path directly into the address bar and replacing <YourUsername> with your actual Windows username.
Replace or Merge with PhotoGIMP Files
Once you’ve located the GIMP configuration folder, it’s time to apply the PhotoGIMP patch. Open the extracted PhotoGIMP folder, and you will usually find one or more folders such as brushes, themes, fonts, and sessionrc or toolrc files.
Copy all the contents of the PhotoGIMP folder and paste them into GIMP’s configuration folder. When prompted, allow the system to replace or merge files and folders. This process will overwrite GIMP’s default configuration with the PhotoGIMP setup, thereby transforming the interface and settings.
Precautions Before Installation
Before making any changes, it is strongly recommended to back up your existing GIMP configuration folder. Simply copy the entire GIMP\2.10 folder and store it in a safe location. This backup will allow you to restore your previous settings in case you face any issues or wish to revert to the default GIMP experience.
Benefits of Using PhotoGIMP on Windows
PhotoGIMP offers several key advantages to users on the Windows platform, especially those who are accustomed to the Adobe Photoshop environment. By bridging the usability gap between Photoshop and GIMP, this patch makes professional-level editing more accessible without any licensing fees. Below is a detailed look at the primary benefits of using PhotoGIMP on a Windows-based system.
Familiar Interface for Photoshop Users
One of the most significant advantages of PhotoGIMP is its user interface, which closely mimics that of Adobe Photoshop. For users who have spent years working in Photoshop, the transition to GIMP can feel disorienting due to differences in layout, tool placement, and terminology. PhotoGIMP addresses this issue by reorganizing menus, panels, and tools to resemble Photoshop’s default configuration.
This familiarity significantly reduces the learning curve. Instead of spending hours trying to locate tools or customize the layout manually, users can jump right into their projects with an interface that feels instantly recognizable. This benefit is especially useful in collaborative environments where team members use a mix of paid and open-source tools.
Improved Productivity with Keyboard Shortcuts
Efficiency is essential for designers, editors, and digital artists who handle multiple projects on tight deadlines. PhotoGIMP enhances workflow speed by incorporating Photoshop-style keyboard shortcuts throughout the interface. This means that long-time Photoshop users don’t need to relearn how to perform basic actions like selecting tools, duplicating layers, or zooming in and out.
These consistent shortcuts save time and reduce frustration, allowing users to maintain their muscle memory and focus on the creative process. Moreover, this feature is invaluable for professionals who work on both Photoshop and GIMP in different environments, as it ensures a seamless experience across platforms.
No Cost – Fully Open-Source
Perhaps the most appealing benefit of using PhotoGIMP on Windows is that it comes at no financial cost. Built on top of GIMP, which itself is a free and open-source raster graphics editor, PhotoGIMP allows users to experience a near-Photoshop experience without any subscription fees or licensing restrictions.
This is a game-changer for freelancers, students, and small businesses that need professional-grade tools but cannot afford the high cost of commercial software. Because it is open-source, users also benefit from a vibrant global community of developers and contributors who continuously improve the software, fix bugs, and add new features.
Known Issues and Limitations of Using PhotoGIMP on Windows
PhotoGIMP offers a streamlined and Photoshop-like experience within GIMP, Windows users may occasionally encounter specific issues or limitations that could affect performance or usability. Understanding these challenges in advance can help you troubleshoot problems effectively and optimize your setup. Below are some of the common concerns users might face when using PhotoGIMP on Windows, along with tips and community-recommended solutions.
Compatibility Warnings from Antivirus Software
One of the first hurdles users may experience is interference from antivirus programs during the installation or setup of PhotoGIMP. Since PhotoGIMP requires replacing or modifying certain configuration files within GIMP’s directory, many antivirus solutions flag these actions as suspicious behavior. This can lead to false positives, where the antivirus software mistakenly identifies PhotoGIMP files as potential threats or blocks the patch from being applied correctly.
To address this, it is often necessary to temporarily disable real-time protection during installation or whitelist the PhotoGIMP files in your antivirus settings. It’s important to download PhotoGIMP only from trusted sources to avoid installing tampered or malicious versions. Once installed and verified, the software typically runs without further interference.
Bugs Triggered by GIMP or Windows Updates
PhotoGIMP is a third-party patch layered on top of the official GIMP software, changes made in future versions of GIMP or updates to the Windows operating system can sometimes disrupt functionality. For instance, when GIMP introduces new file paths, theme changes, or updates to the UI layout, it may override PhotoGIMP’s modifications or render them incompatible. Similarly, certain Windows updates, especially those affecting file permissions or user profiles, might affect the way PhotoGIMP settings are loaded or saved.
These issues may result in missing icons, altered layouts, broken shortcuts, or even startup errors. In such cases, users may need to reapply the PhotoGIMP patch after updating GIMP, or restore configuration files to a previously working state. It’s recommended to keep a backup of your GIMP configuration folder before applying PhotoGIMP, particularly when anticipating major software or system updates.
Community Fixes and Workarounds
Despite these challenges, PhotoGIMP has an active user community that often develops practical solutions or shares workarounds. Forums, Reddit threads, and open-source communities provide step-by-step guidance for resolving issues like broken layouts, script errors, or UI glitches. Common fixes include manually restoring default themes, correcting configuration file paths, or resetting specific plugin files.
If you encounter a problem not addressed in the default installation guide, chances are someone in the community has faced and solved a similar issue. Additionally, some users contribute updated versions of the PhotoGIMP patch that are tailored to specific GIMP releases or Windows builds, offering a more seamless experience.
Tips for Optimizing Your Experience with PhotoGIMP on Windows
Once you’ve successfully installed PhotoGIMP on your Windows system, optimizing your experience becomes key to unlocking the full potential of this powerful tool. While PhotoGIMP already aligns GIMP’s interface closer to Adobe Photoshop, there are several ways to enhance usability and productivity even further. Below are some expert tips that can help you get the most out of your editing workflow.
Master Keyboard Shortcuts Aligned with Photoshop
One of the primary benefits of PhotoGIMP is its integration of Photoshop-style keyboard shortcuts. These shortcuts replicate the familiar commands used by Adobe users, making the transition seamless. For example, common functions such as Ctrl + T for transform, Ctrl + D for deselect, and B for brush are mapped similarly to Photoshop.
To take full advantage of this, make a habit of learning and practicing these shortcuts during regular use. Not only does this speed up common tasks, but it also minimizes your reliance on mouse navigation. If there are any shortcuts that don’t align with your preferences or habits, GIMP allows full customization via the “Keyboard Shortcuts” settings. Adapting them to your personal style ensures even greater control over your workflow.
Customize Tools and Themes to Fit Your Workflow
PhotoGIMP provides a much more refined and Photoshop-like interface out of the box, but it’s still entirely flexible. You can go beyond the default setup to create a truly personalized editing environment. Begin by exploring GIMP’s extensive toolbox and dockable dialogs. Arrange them according to the type of work you do most often—whether that’s photo editing, illustration, or graphic design.
Theming is another area where customization can greatly impact comfort and productivity. PhotoGIMP includes a dark theme reminiscent of Adobe’s UI, but you can explore other themes if you prefer lighter tones or higher contrast settings. Modifying brush presets, color palettes, or tool presets based on your projects will help you stay efficient and organized.
Don’t hesitate to create your own workspaces and save them. These can be quickly loaded depending on the task, such as one layout for editing and another for digital painting. Customization gives you the advantage of working in an environment that feels intuitive, familiar, and optimized specifically for your needs.
Engage with Forums and Communities for Continuous Learning
As with any powerful software, there may be moments when you encounter limitations, bugs, or simply want to learn new techniques. This is where the GIMP and PhotoGIMP communities can become invaluable. There are many active forums, discussion groups, and community platforms where users share tips, troubleshooting guides, and custom resources like brushes, plugins, and themes.
Joining these communities gives you access to collective knowledge from both beginners and seasoned professionals. Whether you’re stuck on a technical issue or looking to expand your creative techniques, community interaction helps you stay updated and supported.
Conclusion
PhotoGIMP offers Windows users a powerful way to bridge the gap between GIMP and Adobe Photoshop by providing a familiar, efficient interface tailored for creative work. With the right approach—mastering Photoshop-style shortcuts, customizing your tools and workspace, and engaging with the user community—you can significantly enhance your editing experience. Whether you’re a professional designer or a hobbyist transitioning from commercial software, optimizing your PhotoGIMP setup ensures a smoother, faster, and more enjoyable workflow on Windows.